|
How to create a Roof using GLB3 In this tutorial i will show you how to create a simple roof for an L shaped building using GLB3's invisible walls and the Auto Floor tool.
1: (I'll assume you've already created the simple building ;) ) First select all the outer walls of the building (in this case just select all the walls) and then press the 'Ceiling' button.
In the window that appears press the 'Go' button. This will do a quick multi-storey of the walls and set them to be invisible. This will be the starting outline of the roof.
2: Create a grid above the walls and, draw lines to form the inner shape of the roof. These lines make the shape of what the roof should look like from the top view; look at the picture below. When this is done, add them to plan, they should look like these images when your finished.
3: Next we need to lift up the inner points in order to give a pitch to the roof. To do this press 'Edit verts' and then lift up the 3 inner points highlighted below. Use the Nudge Tool to easily nudge up these verts 128 units.
When you are finished lifting the verts your building should now look something like the one below.
4: Next lets floor these new rooms to create the roof. Set the Floor Depth to 8 and then press 'Auto Floor'.
The building should now look like this. The problem here is that you have walls on your roof, so to fix this make them invisible. To do this select the wall on the roof and then set their width to zero. This is a nice example of why invisible walls are useful.
You should then have a roof like this. This roof is pretty good, but the one thing i don't like about it is that it does not overhang the walls. To fix this we need to move a few more verts. 5: Select the invisible walls that form the roof, to do this just select one invisible wall and then from GLB3's selection list select 'Connected Walls'. This should select all the walls that form the roof. Now press 'Edit Verts' You should now only see the verts belonging to the roof. Select the outer points of these and nudge each of them out 16 units so that they look like the image below.
Now you have a nice over-hanging roof.
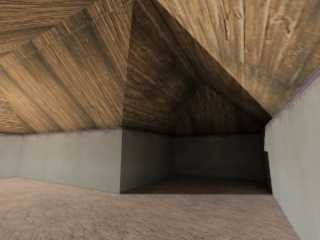
The great thing with this roof is that it is hollow, so you have a nice attic space inside.
Here is an image of the inside of the building with some nice textures and lighting. Time taken to create roof: ~ 90 seconds To ask any questions go to the Maple3D Forums . Copyright © 2006 Michael Little, All Rights Reserved. |